Crayons, those sticks of colors that we often use when we were children to color the walls and pieces of paper soon get boring when we get older and coloring within the lines (or on walls) becomes passe. Well, a few months ago, I discovered a new creative (and really fun) way to use crayons - crayon melting. Yes, you read me right, melting crayons is the latest craze in town (my town at least) and how could you not want to try melting them? :)
I thought this was really cool and since I discovered this method. I have always wanted to give it try it. So yesterday, I decided to give it a go in my spare time.
 |
| Not bad eh? |
Interested in making your own crayon melt art? Don't worry it is actually really simple to do!
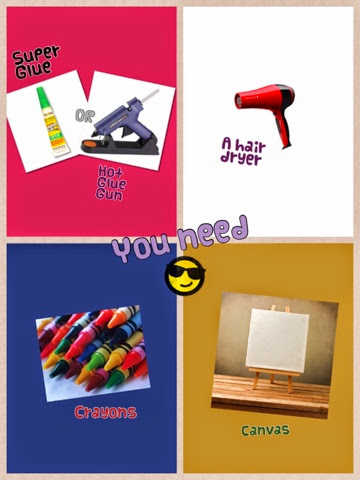
4 things you'll need:
 |
| Tools needed |
Step 1: Select the crayon colors that you want to use.
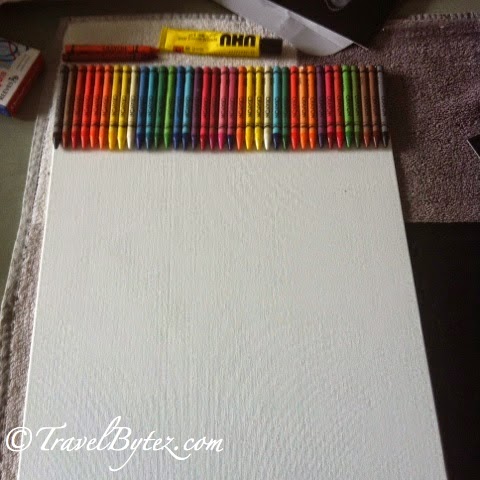
Step 2: Place the colors in the order that you want. You can either place them according to the colors of the rainbow or any other color scheme that you prefer.
Step 3: Glue each crayon (facing down) to the canvas.
 |
| If you want, you can remove the crayon wrapper the final result to be with the wrapper. |
Step 4: Place the canvas vertically with crayons at the top. It's going to get messy, so don't forget to protect your walls and floor with newspapers or anything that can contain the mess.
 |
| Place the canvas vertically |
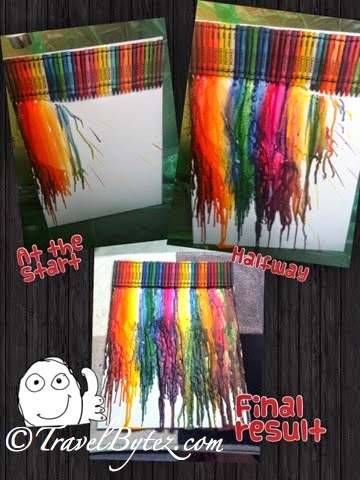
Step 5: With hairdryer in the other hand, turn it on and go over the crayons until they melt. You can blow them gradually and modify your blowing angle to direct the melting wax in any direction that you want. It takes about an hour or so for all the crayons to melt.
... and the final product....
 |
| The final product |
 |
| The melting process |
When you are a bit more familiar with the process, you can try different styles and creative ways to melt them to make more creative designs with stencil. Stay tuned because I just might get in a creative mood again and melt more crayons!

0 comments :
Post a Comment